When using a Learning Management System for an eLearning project, customizable fields related to users’ profiles allow you to better organize your training, as well as your users management.
The Docebo E-Learning platform comes with some intuitive tools that let you easily organize the information about your users. This brief tutorial is about how to customize the users’ data and organize them in the best way for your business.
1. Customize additional fields
The additional fields tool allows you to customize the fields your users have to fill-in during the subscription. In this way you can decide to add information that may will be useful, not only for the online training, but also to manage the database.
For example, let’s say that for a specific kind of training you need to know your employees’ blood type. You can edit the users’ profile and add “Blood Type” as an additional field: by this way, you can always collect all the information you need.
Once inside your Docebo Cloud, be sure that you are using the Advanced Version, than go to the Admin Area. Click the Settings icon and select Additional Fields.

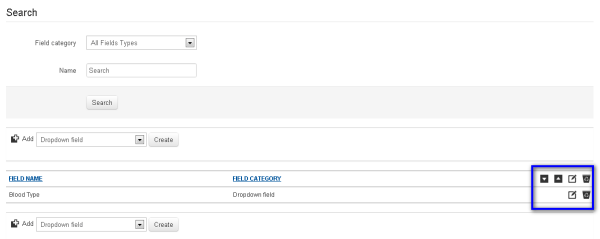
Choose the kind of additional fields you want to add, and click Create. In the example below we’ve used a dropdown field (users will be able to select a value from a list).
Insert the name of the additional field you are about to create. You can also have additional fields in multiple languages: just fill-in the fields according to the languages you actually need.

You can use the menu on the right to: manage additional fields order; edit or delete them.

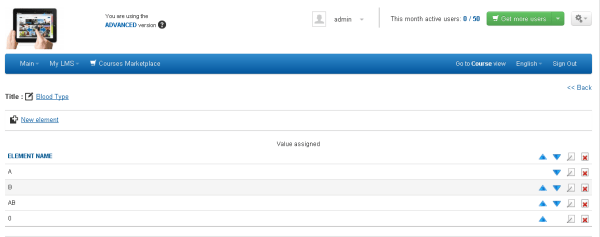
The edit icon will redirect you to this page: this is where you can add options if you are using a dropdown field.

Once you have added the options, you: change their order; edit or delete them; by using the menu on the right.

2. Create your organization chart
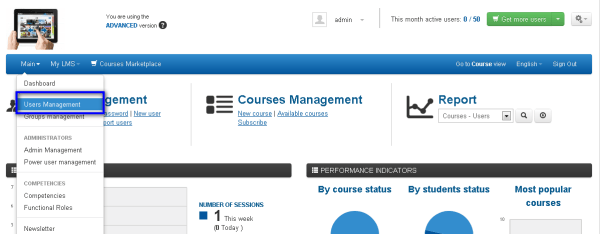
The organization chart tool is very helpful for users management activities. When the organization chart is well organized, the administrator is able to easily manage courses and reports. While you are inside the Admin Area, choose Main – Users management from the upper menu.

From the users management panel you can create a new organization chart by clicking add Node. You can also decide to add a specific code.

If you want, you can also add a sub-node. Once the node has been created, you can assign to it some users. Click on the highlighted icon and use the list to select the users you want to be associated to this node.

3. Assign additional fields
If you want that different information about users are visualized for each node of your organization chart, you can use the Node fields option. Click the node fields icon (user management panel) next to the node you are interested in.
Choose the fields you want to be displayed for this node during the user subscription. Each field can be set as: mandatory; valid also for sub-nodes; invisible to the user.

