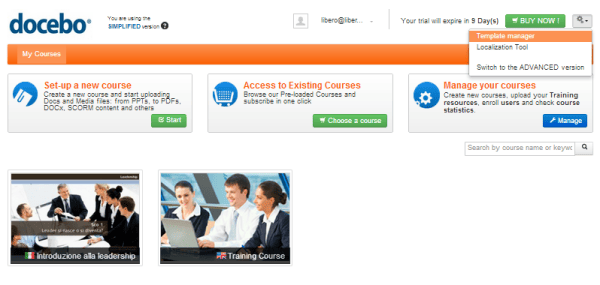
Here at Docebo we believe that one size doesn’t fit all: this is why the Docebo Learning Management System comes fully customizable! Thanks to the LMS template manager, it’s that easy to change LMS logo, log-in page and layout.
This article is intended to show you how to customize your E-Learning platform in a few, simple steps!
1 – Access the Template Manager
This is the first step, required for any kind of customization. The easiest way to access the template manager is by using the simplified version of the LMS.

2 – Upload a new logo
You’re now able to upload your own logo (max 200 Mb): click “Choose File” and select the logo you want to be displayed. Now click “Save changes” and your logo will be shown on the top-left corner of the page. You can also customize the Page title, that will appear as Browser title.
In order to be effective, we would suggest you to use your company logo or at least a logo specifically created for the training project you’re about to launch. The logo should be appealing and representative.

3 – Customize the log-in page: image and layout
It’s time to customize the log-in page. You can pick one of the pre-loaded images, or decide to upload a new one. The image must be 200 Mb max (we’re pretty sure it won’t be a problem!). For best results, we recommend an image resolution of 900 x 372 px. Once the upload is complete, you’ll be able to see a preview.

You can also choose among three kinds of layout:
- Side sign in form
- Top sign in form
- Bottom sign in form
Moreover, you have the chance to enter a title and a description for your LMS. These texts can also be translated into different languages if you are using the E-Learning platform for a multiple-language training. When you are satisfied with the customization of your log-in page, click Save Changes.

4 – Add Sign In Web Pages
Another customization can be made through the Sign In Web Pages tool, accessible by the Settings/Admin Area menu. This tool allows you to add links, videos, texts and images to better highlight the training project purposes.
In order to insert a web page, select add, complete the form with the information you want to be displayed in the log-in page and click Save Changes. If you want to make a web page visible, you have to activate it: select the flag, and it will become green.
Remember: If you have added more than one page, you’re able to manage them by using the arrow in the menu.

5 – Final Result
As you can see, we have added a logo on the top-left corner of the page; a presentation text next to the log-in form; two web pages under the central image. Finally, we have customized one of those pages with some text, an email address and a small image.

